How to make an [S] Page in 2023 (And above)
1/22/2024 edit:
It's been a while since I've written this guide, and I've learned a lot of things since then.
For starters, in this tutorial, I used Adobe Animate CC 2020. Now I use Animate 2023. The version of Animate 2020 I used had pretty buggy image exports. Thats about it.
That being said, if you're planning on animating a full non-interactive flash, I'd personally advise against using HTML5 for multiple reasons, and instead would opt for animating it in ActionScript and rendering it to a high quality video.
Why? Firstly, tweens in animate's HTML5 animations tend to lag and stutter... a lot. This also typically results in frameskips that can make your animation's timing look odd. Second, videos just load a lot faster. Recently DeconRecon announced they found a way to reduce loading times for HTML5 flashes, but I don't think they've publicly explained how (yet). Animating in HTML5 is also just a hassle in general. A lot of features are missing (like blur/motion blur) that can only be replicated by *gags* manually blurring your images in another software. To render the animation to a video, you would also have to convert it to Actionscript anyway, which can result in some visual errors that can be finicky to fix, ESPECIALLY if you're using the camera tool. If you don't use the camera, you may be fine. Also some of the aforementioned frame skips can result in the animation skipping frames that contained scripts, causing them to not run at all and potentially breaking everything.
Ok yeah that's basically it. I'm not saying you should NEVER animate in HTML5, if you want to then go ahead, it still does allow for cool things like animated start screens, ending loops, etc. It's especially useful for Strife pages and panel menus, which I am considering making a tutorial for in the near future.
Alright, peace out (for now). I hope you enjoy this tutorial...which I may also make edits to after writing this.
Table of Contents:
> Introduction.
Everyone likes Homestuck's flash animations (aka [S] pages) (aka sound pages). They're fast paced, synced to music, and cram a lot of storytelling in several minutes of epic tweened visuals
(an example of an [S] page)
...
UNFORTUNATELY FLASH IS DEAD!
Thankfully there is an alternative if you still want to make working [S] pages. A much harder to use alternative. An alternative that I also can't find any good tutorials for. Except for THIS AMAZING ONE which talks about how to port an SWF animation to HTML5. We won't be doing this though.
Basically we're going to make an [S] page in HTML5 using Adobe Animate CC. This way you won't have to use Ruffle or Swivel or anything to make your animation work. This also has the added benefit of working on mobile devices. The main detriment is that this is HARDER. So keep that in mind. Alright, first of all let's look at the
> Prerequisites.
- Adobe Animate CC (duh) [expensive unless pirated]
- Audacity (An audio editing program that'll make your life easier) [Free!]
- A place to host the files for your animation, like File Garden (Not Neocities, unless you have a membership. They don't allow audio files to be uploaded)
- Any image editor to make your animation assets, however this tutorial will be using Adobe Photoshop CC [expensive unless pirated]
- Any place to embed your animation. Ideally this would be MSPFA, but since MSPFA is down at the time of writing, this would be something like Neocities.
- OPTIONAL: JPEXS flash decompiler, a program that can allow you to rip open a flash and inspect or extract its assets, or even convert it to an fla. Great for getting music and art from actual Homestuck flashes and seeing how they work.
Finally, you should have a *basic* knowledge of Animate. If you know how keyframes work, and how to move things around and animate them, you're gold. If you don't, watch literally any Adobe Animate tutorial.
Ok now that we have all that squared away, let's begin
> Preparing your assets.
Obviously you can't make an MSPFA flash without any IMAGES to ANIMATE! Here's a screenshot of my assets in Photoshop (I drew these beforehand):
I drew everything on one layer and sliced them up with the slice tool. Obviously these are pretty haphazard because I'm only using these for a 10 second example, but you get the idea.
I also have already named all the slices beforehand (By double clicking with the slice select tool)
A more scalable approach will be to put each asset on a separate layer, then shift select all the layers, right click and select "Quick export as PNG", but I'm not doing this.
Anyways, let's move on to
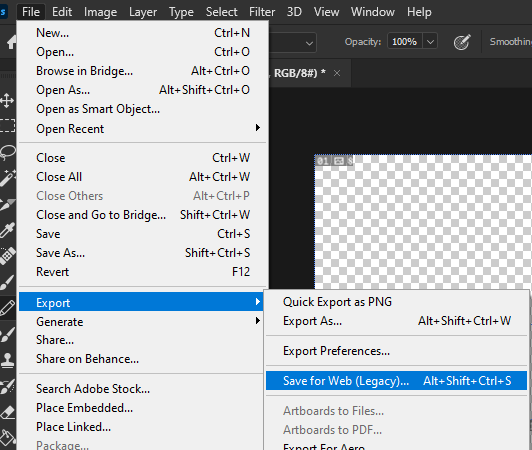
> Export the assets.
To export all our slices at once, we'll have to use the Save For Web menu.
Which looks like this. If you've made a GIF panel before, you should be pretty familiar with this by now. I love this menu so much.
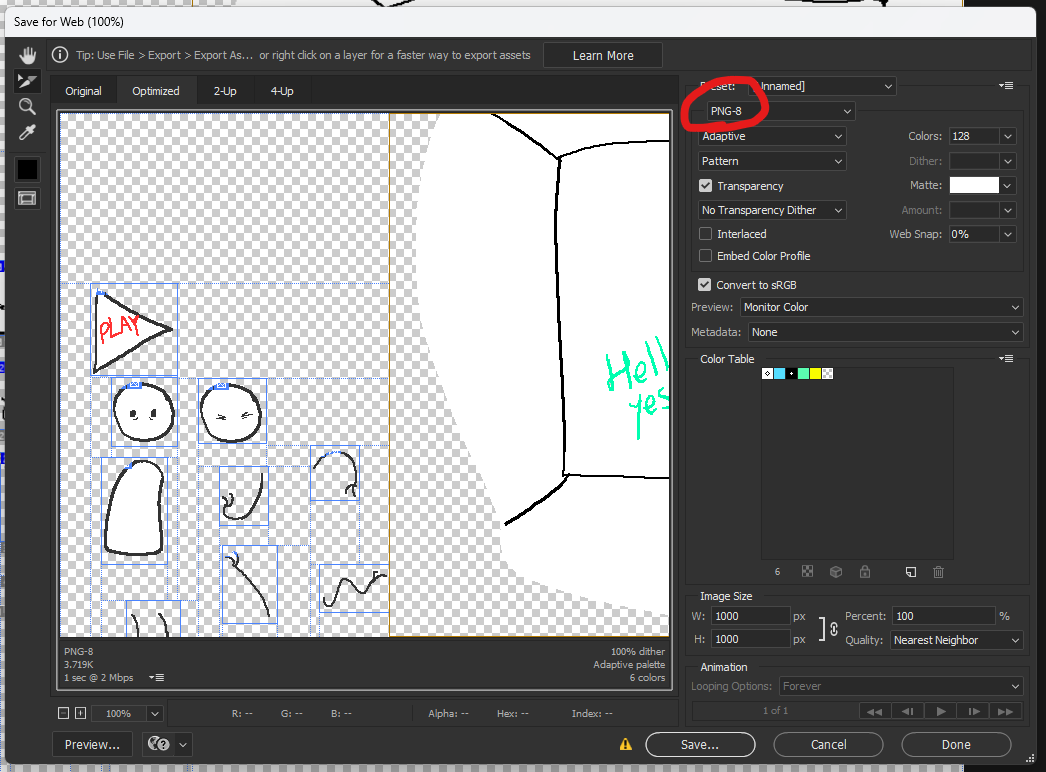
Make sure to set the format to PNG-8 or PNG-24 as circled above
For now, we'll just export all the slices we made. Ideally you should do this in a dedicated folder. Clicking [Save...] should show this menu:
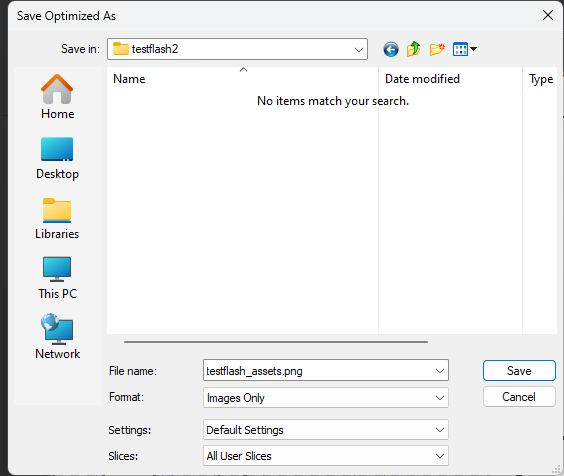
WAIT!
If you just hit [Save] here, you'll also export all the slices Photoshop made, filling your folder with a bunch of junk images we don't need. Instead, set this option to only export the slices YOU made:

After exporting, Photoshop will put all the slices into a folder called "images". Rename this to something else:
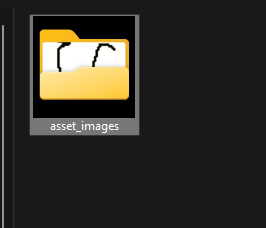
Why? because when you eventually publish your animation, it'll automatically create a folder called "images" (can't be changed), which will overwrite any existing folders of the same name.
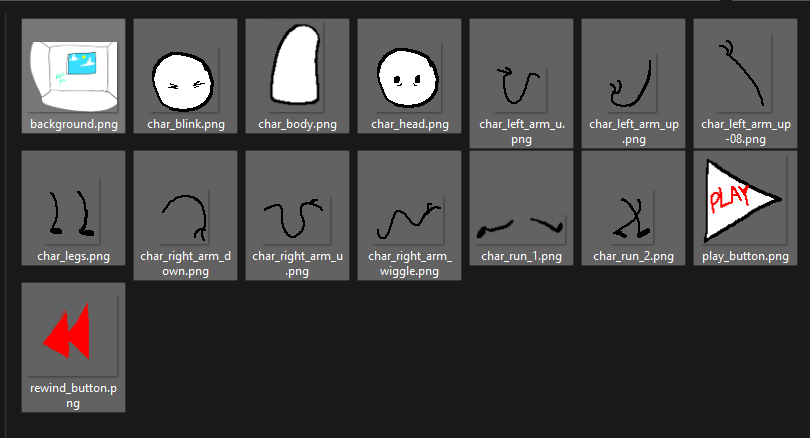
Anyways, if you look in your folder, you'll see ALL your assets in separate files. Pretty neat, right? If you named your slices beforehand, they will all have custom filenames.
Ok now let's get some audio. I'll be using this song:
Which I definitely downloaded through perfectly legitimate means.
> The Preloader Graphic.
Ok, one more thing and then we'll start animating.
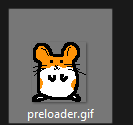
You know how in homestuck flashes, they have a neat little loading screen animation? Kinda like this:
These are called preloaders. The idea was that with flashes, these loading screens would loop while the flash is... loading. Fortunately (unfortunately), Preloaders aren't really a thing in Adobe Animate anymore because its built-in now. However, you CAN still set any custom gif as your preloader. For this I'll use a hamsterdance gif.
Wanna make your preloader span the whole panel/canvas? That often results in some weird visual bugs I'll explain how to fix in the EXTRAS section
Alright, now that we have all our assets, we can move on to
> Create the actual animation.
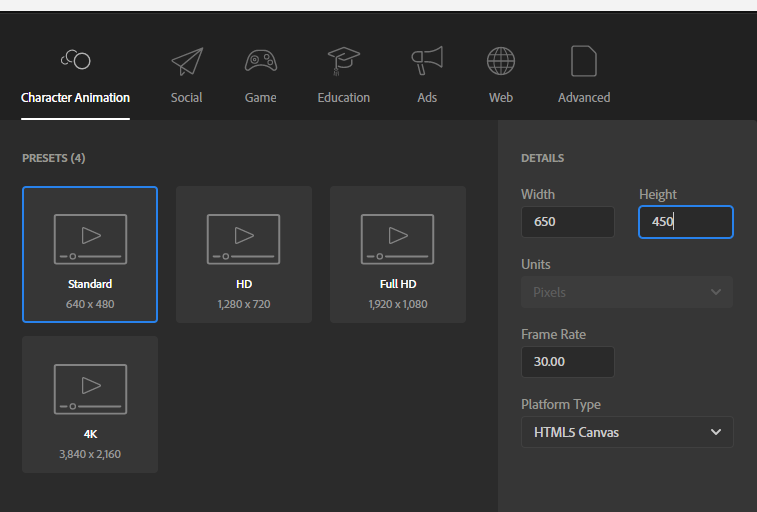
Ok, now we'll open Animate and create a new project with these settings (the framerate and platform are important): UPDATE: After making this I was told that the actual homestuck flash framerate is 25 FRAMES PER SECOND, not 30. Take this into account if you want when animating your own flashes. Note that this tutorial will be in 30fps because I don't feel like reanimating the entire flash and rewriting the tutorial.
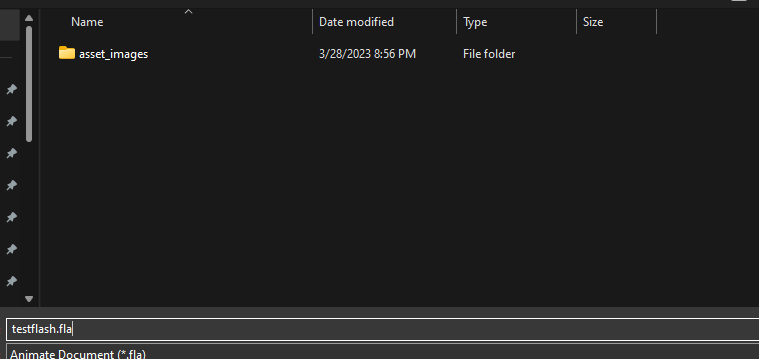
Save your project in your dedicated folder:
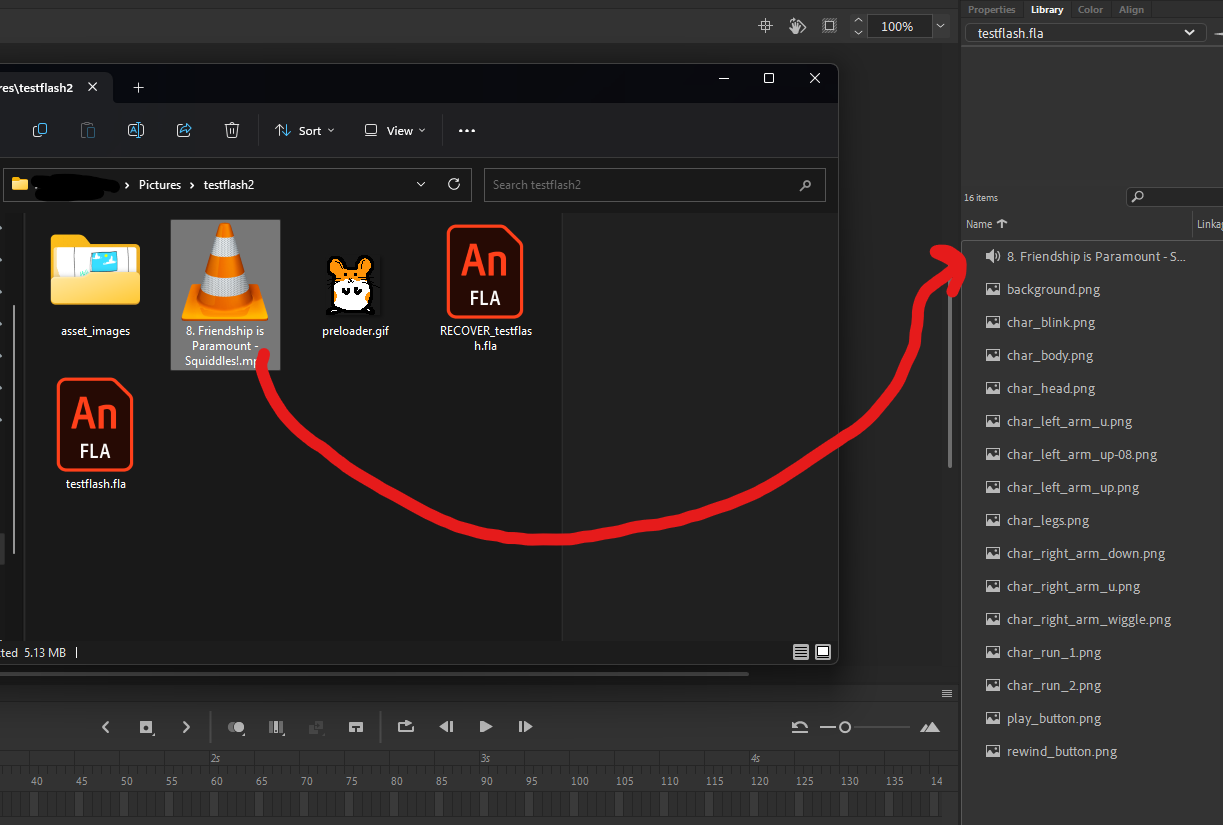
Next, import all your assets by dragging them into the library:
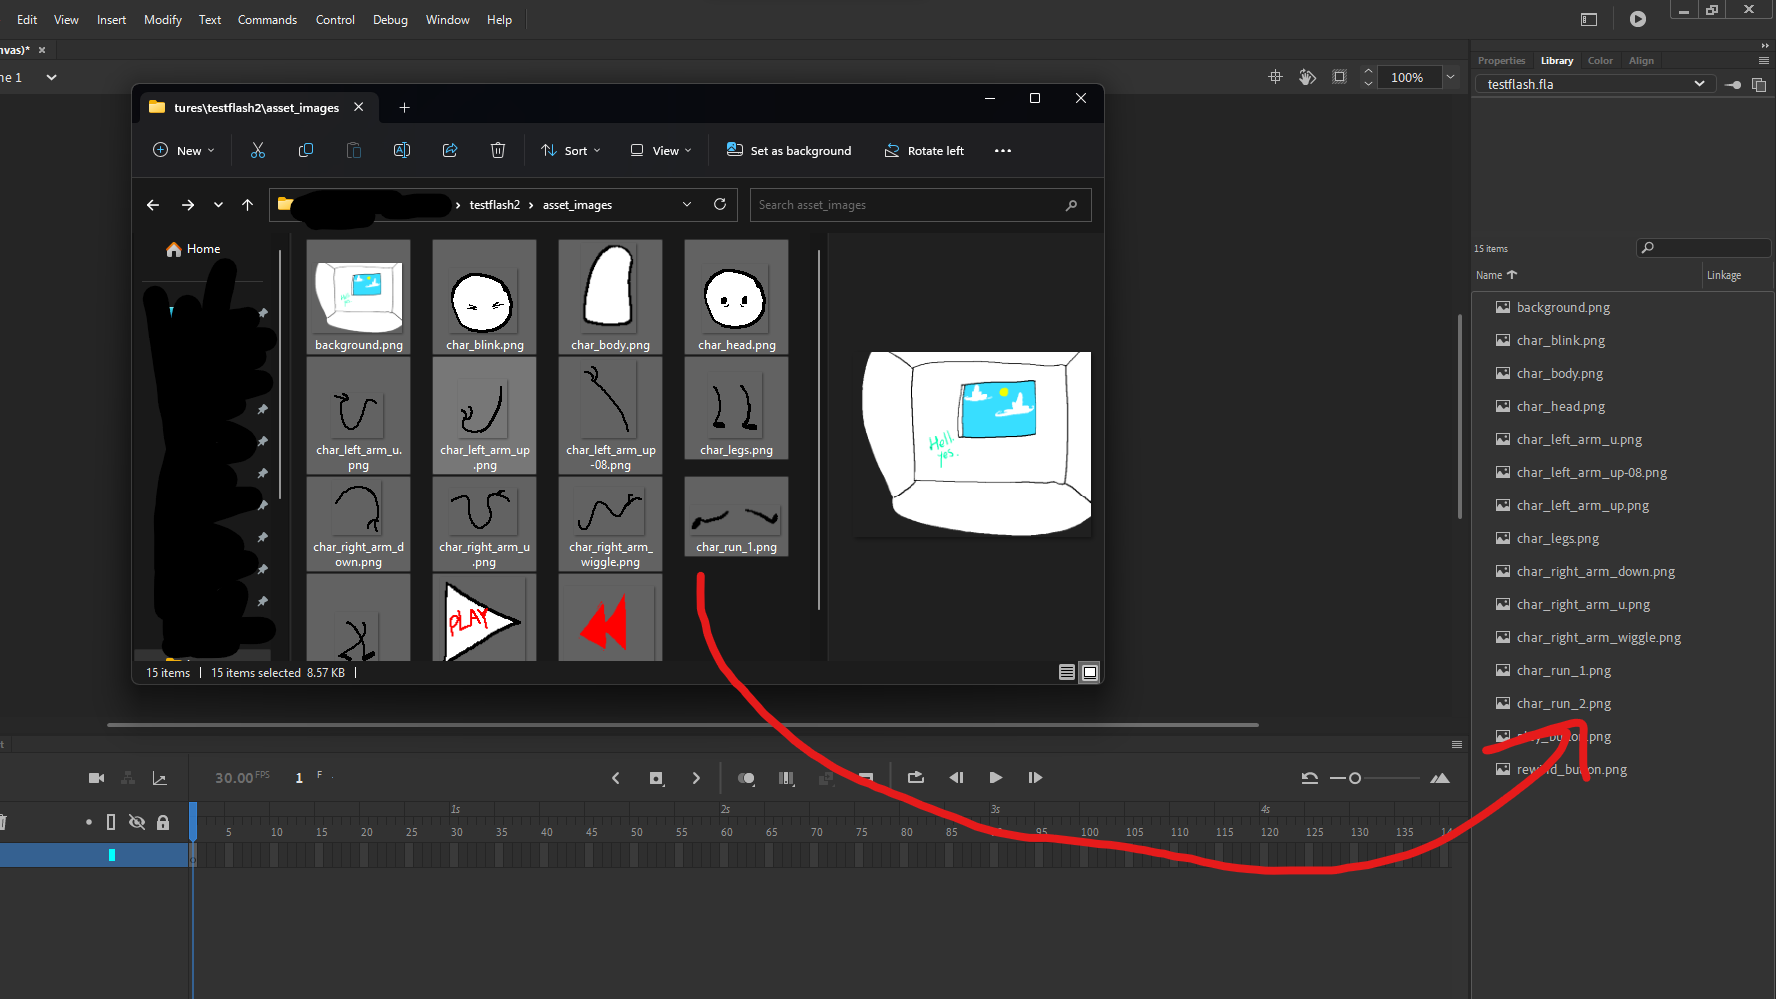
And don't forget to import your audio too. Don't worry, you don't need to import your preloader yet.
IMPORTANT!
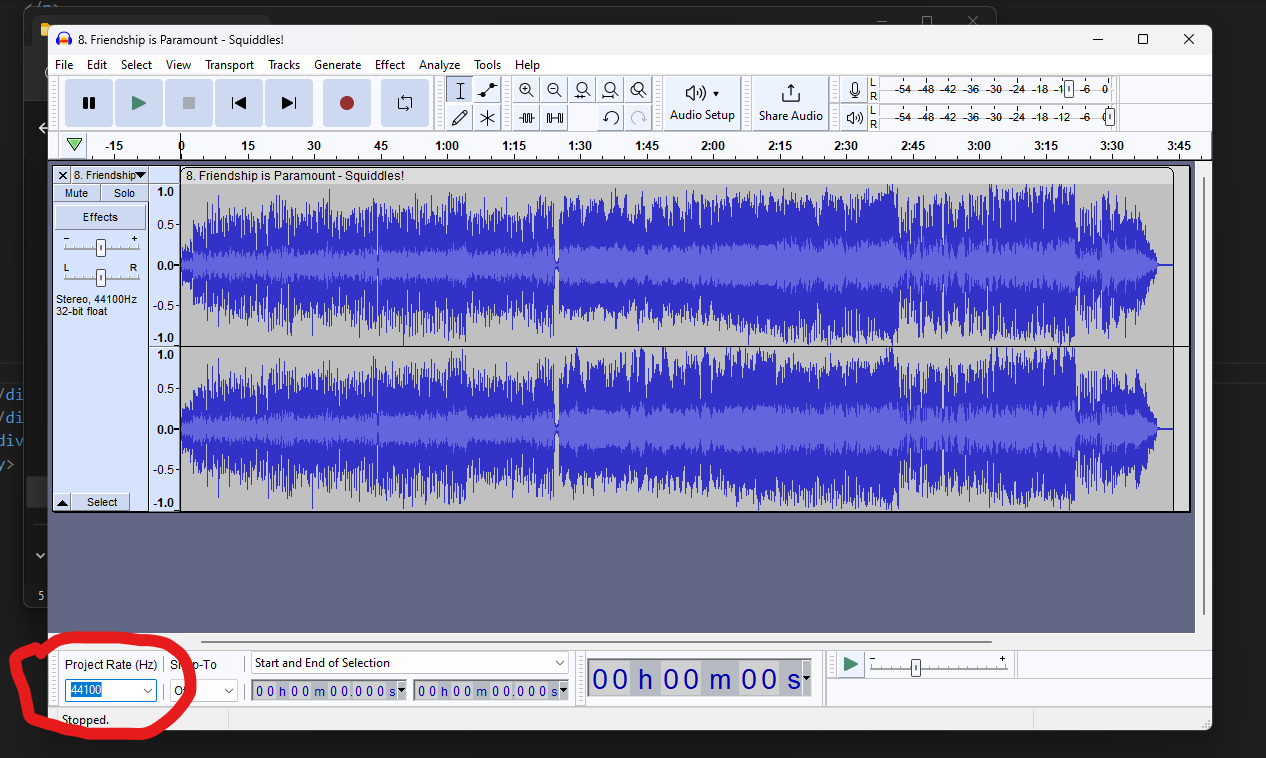
If Animate gives you an error when you try to import your audio, then do this:
Open your audio in Audacity, then set the Project Rate to 44100 Hz. After that, re-export it and it should work fine.
> The basic structure of our animation.
Alright, first, let's figure out how this animation will be structured.
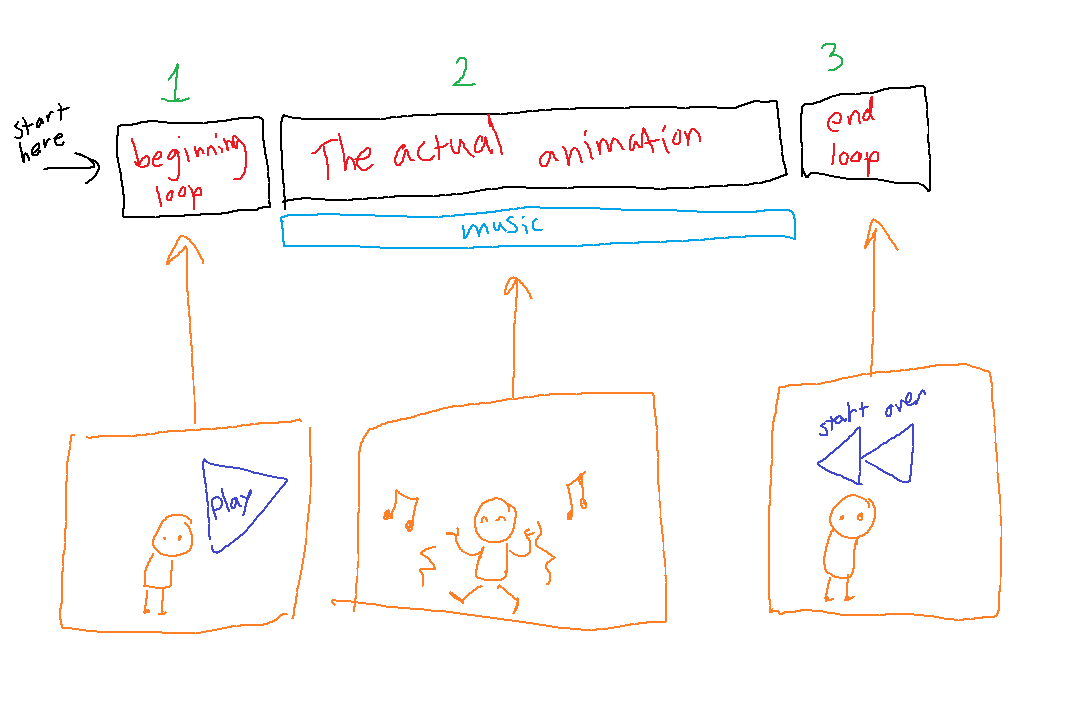
Basically, when you start, the first section (1) will loop over and over until you click the start button.
When you click the start button, it'll go to the beginning of section (2), where the actual animation (and music) will play.
After the animation is done, it'll enter the end section (3), which will loop over and over until you click the restart button, sending you back to the start of (2).
Now that we know what we want, let's
> Begin animating.
This animation will be 10 seconds long, but I'm going to make the beginning and end loops 3 seconds each too, so let's drop in the background in its own layer and make this 16 seconds long.
Let's also add in two extra layers, an audio layer, which will go on the bottom, and an actions layer, which will go on the top. The actions layer will hold all our code.
While we're at it, let's also create two keyframes at the 3 second and 13 second mark, and drag our audio into the 3 second keyframe.
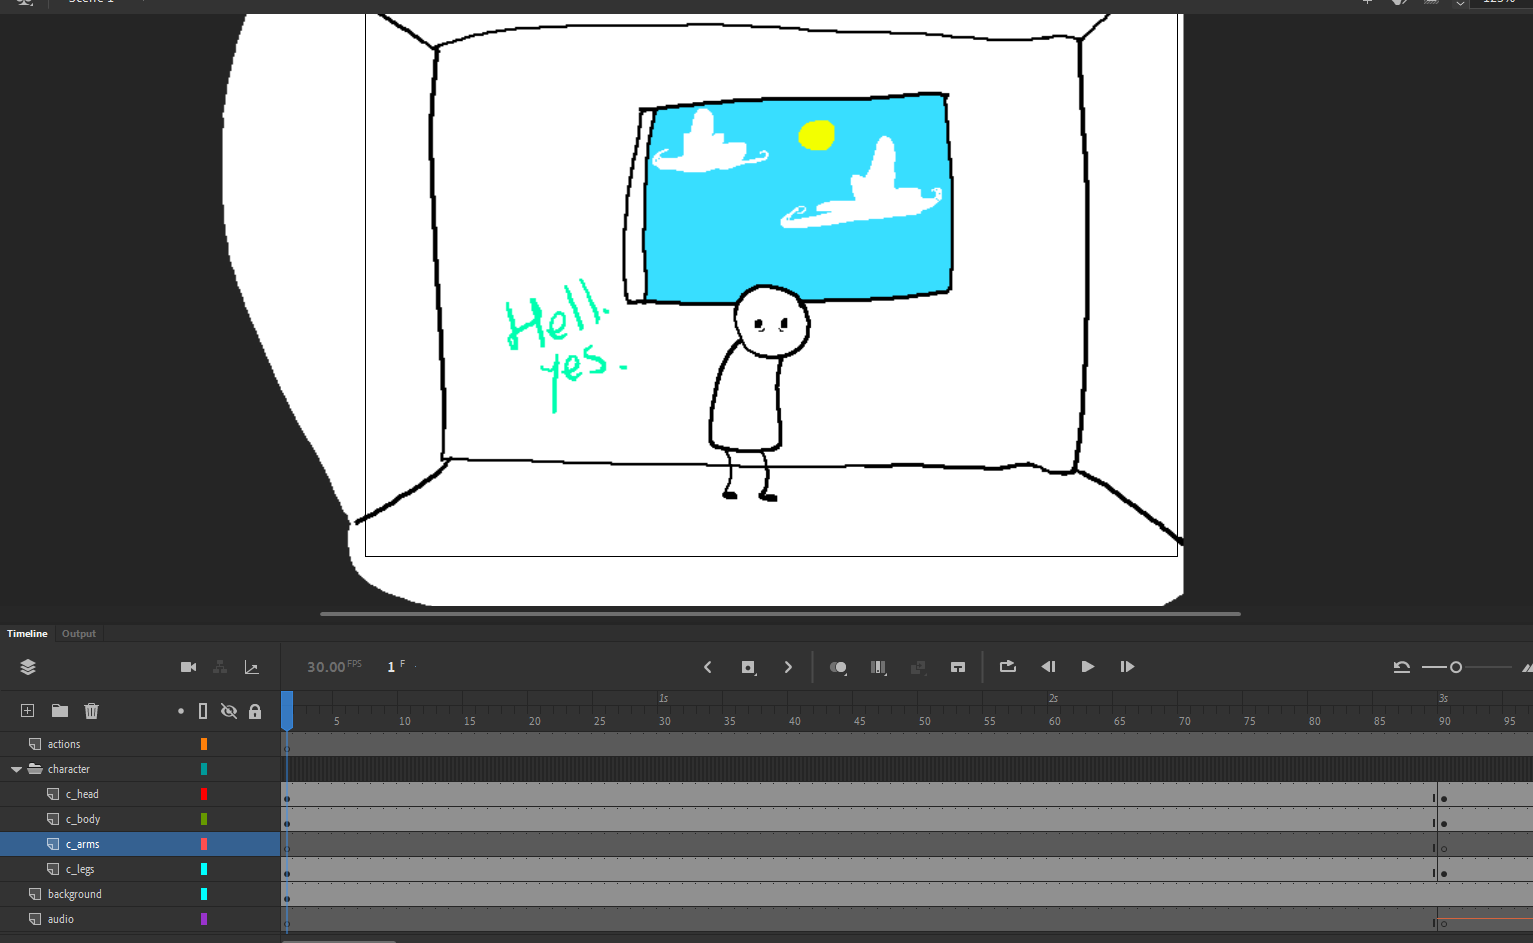
Now, the timeline looks like this (audio frames selected for visibility):

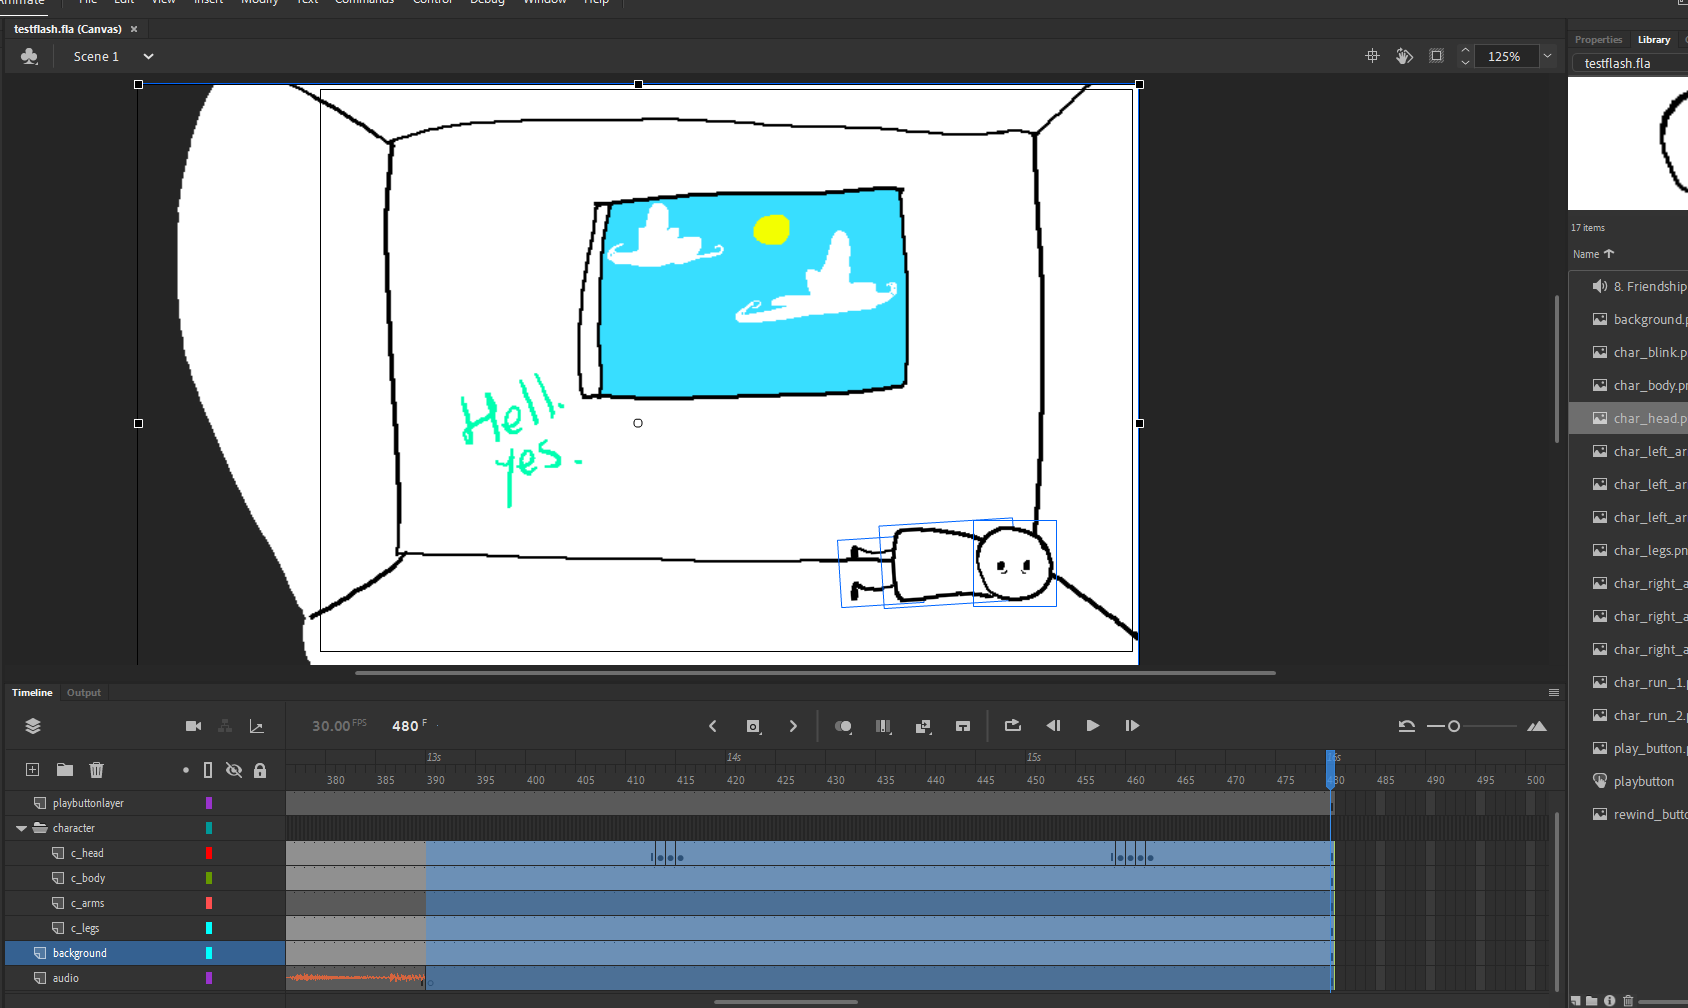
Ok, next let's add in our character. As you can see, I've made a layer group for the character, and dragged each body part in on separate layers.
I also made a second keyframe at 3 seconds so our character goes to this position at the start of our animation.
First, I'll animate some random shit for the character to do in the beginning section. I'm only animating the first 3 seconds, where he just does this:
Obviously, if I play the animation now, he'll just do this one time and go back to his default pose when section 2 starts, so let's set up the play button and loop now.
(sidenote: you can test your flash by pressing Ctrl+Enter)
> Create the play button.
First things first, let's create a layer for the play button and drag it onto the stage at frame 1:
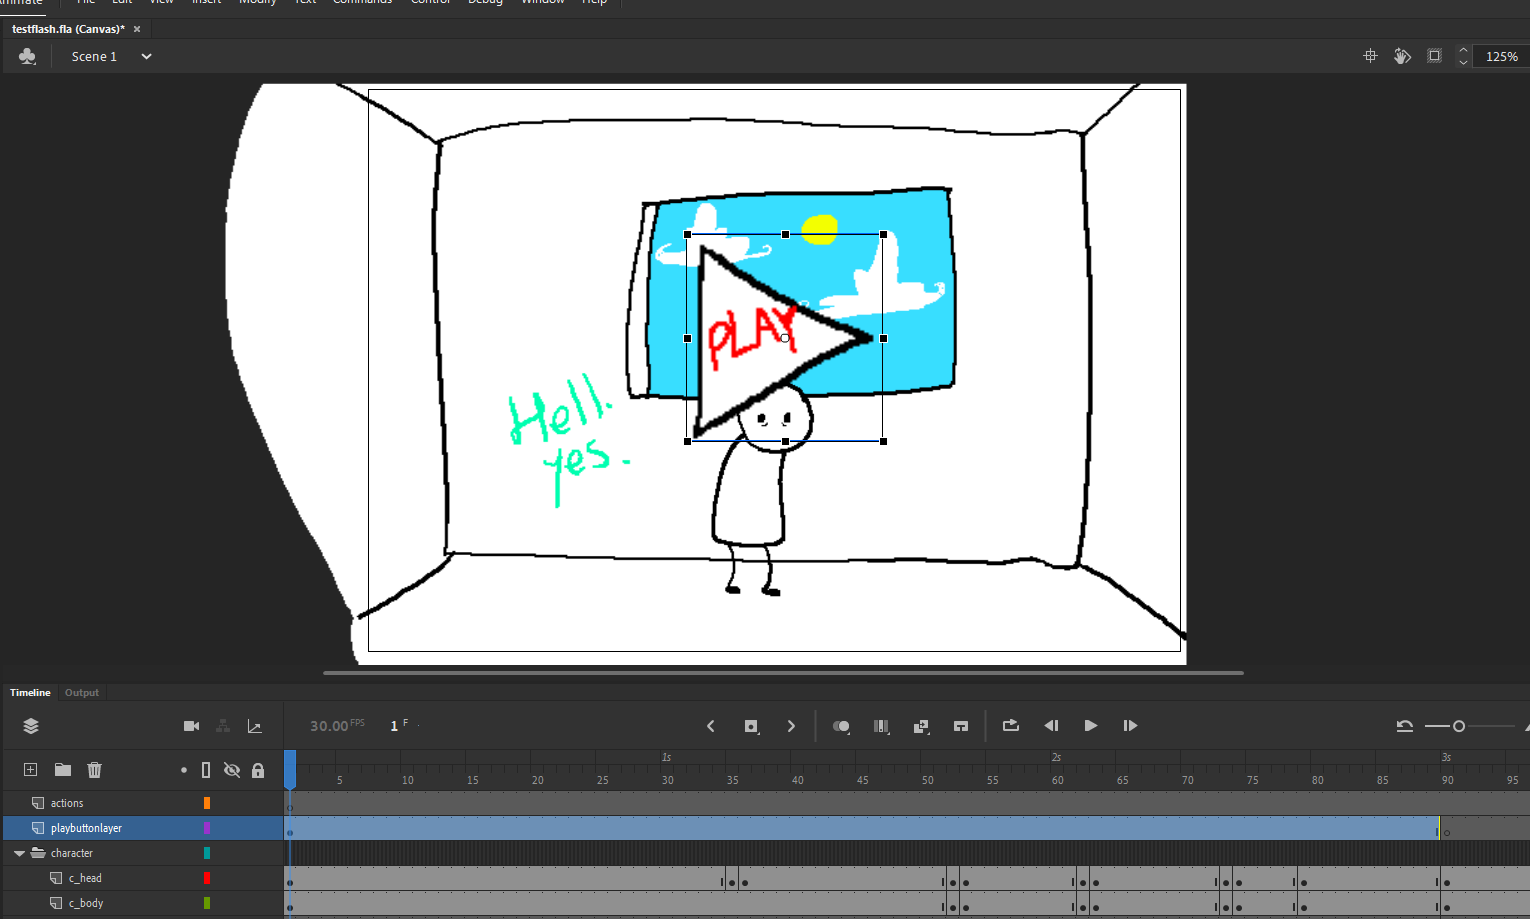
Don't forget to create a blank keyframe at the 3 second mark (or whenever your animation starts) so that it disappears when you start the animation.
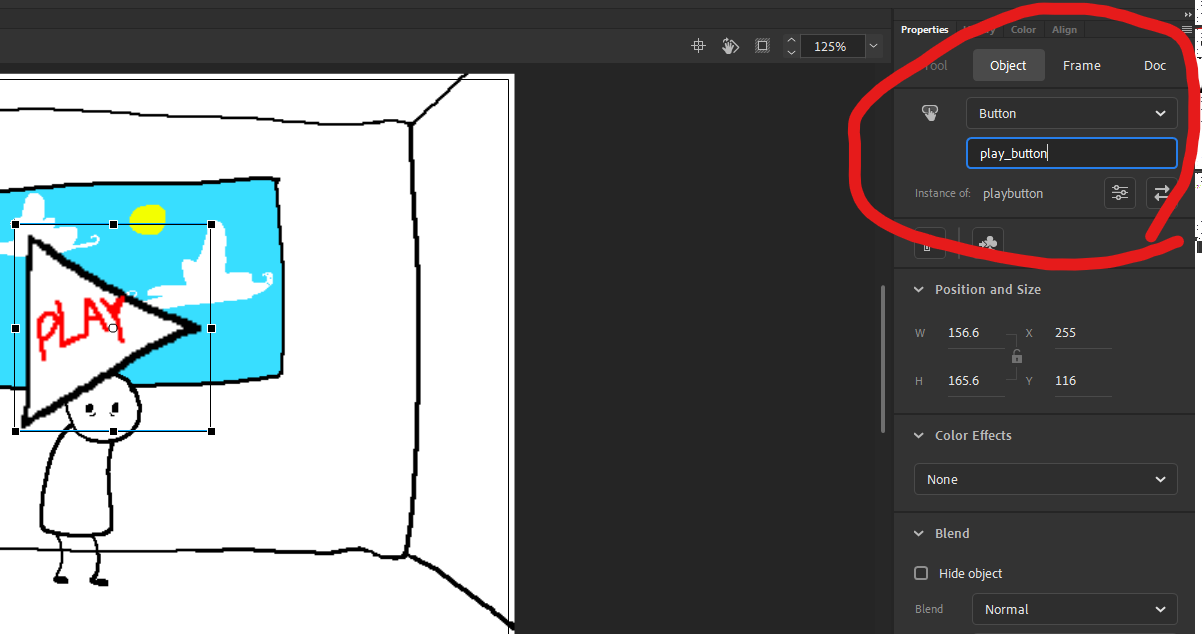
Right now the button is just an image, so you want to convert it to a Button symbol first, by selecting it and pressing [F8] or right clicking it and choosing "Convert to Symbol".

Don't forget to set "type" to button!
Also: Select the button and set the instance name to "play_button" so that we can access it in our code.
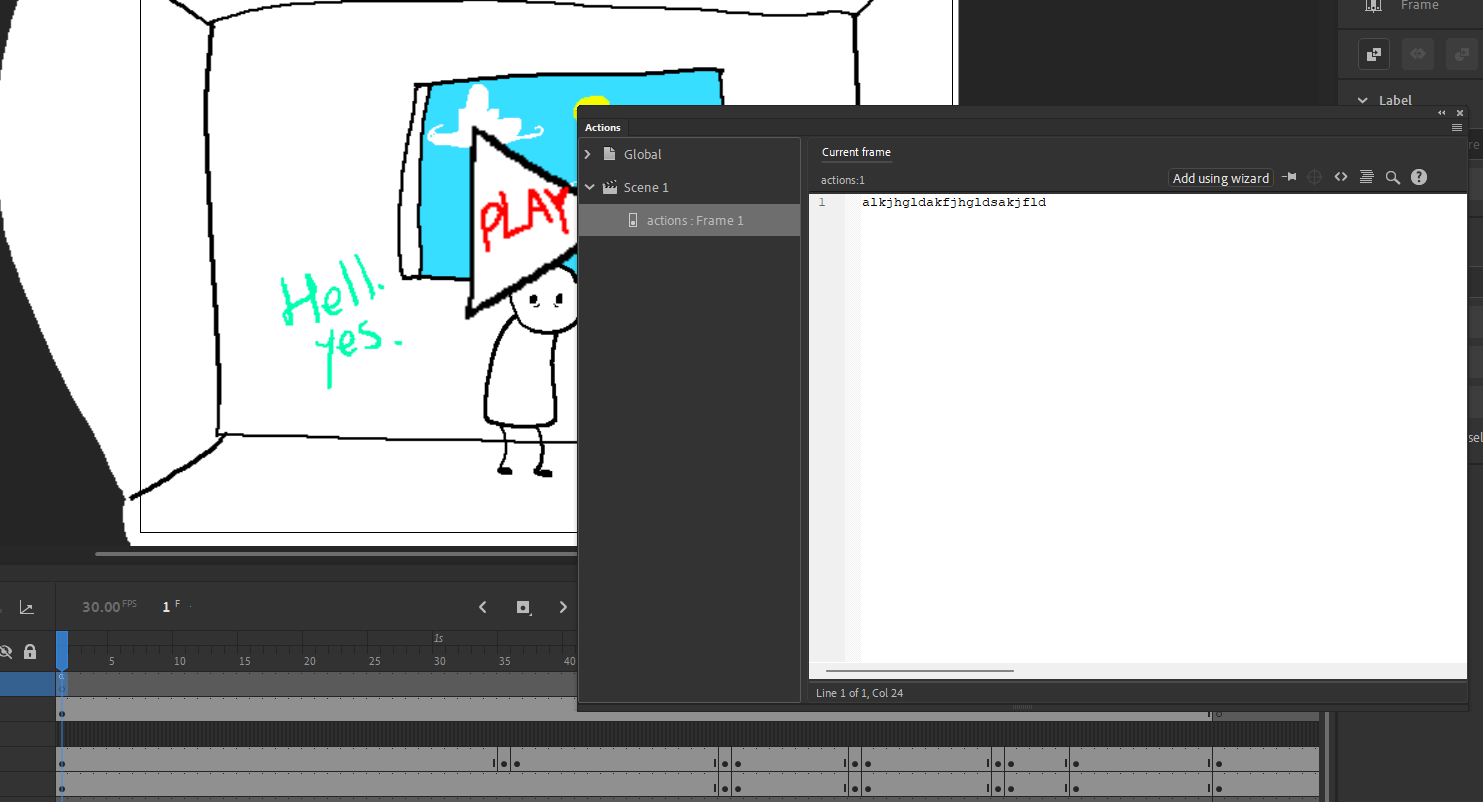
Next, we want to set up the code so the button... does its thing. First, create a keyframe on frame 1 of the "actions" layer, and press [F9]
Now, you should see a window like this with a typing area.
Now just put in this code. I'll put it below this pic so you can copy paste it.
In here, this.gotoAndPlay(90) sends you to the 90th frame, or the 3 second mark. Depending on when your animation starts, you can change that number.
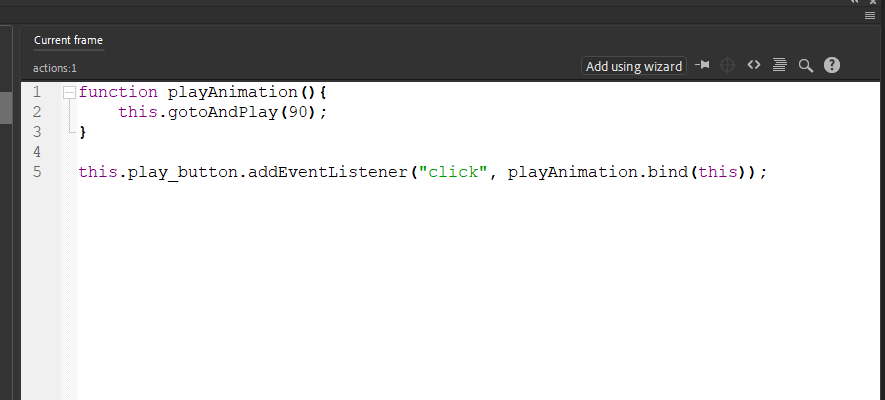
The code:
            function playAnimation(){

                this.gotoAndPlay(90);


            }


            this.play_button.addEventListener("click", playAnimation.bind(this));
Now if you test the animation, clicking the play button should send you to frame 90, or the start of the animation. This is pretty cool, that means our code works, but we forgot to make the beginning loop when we don't click it, so let's take care of that.
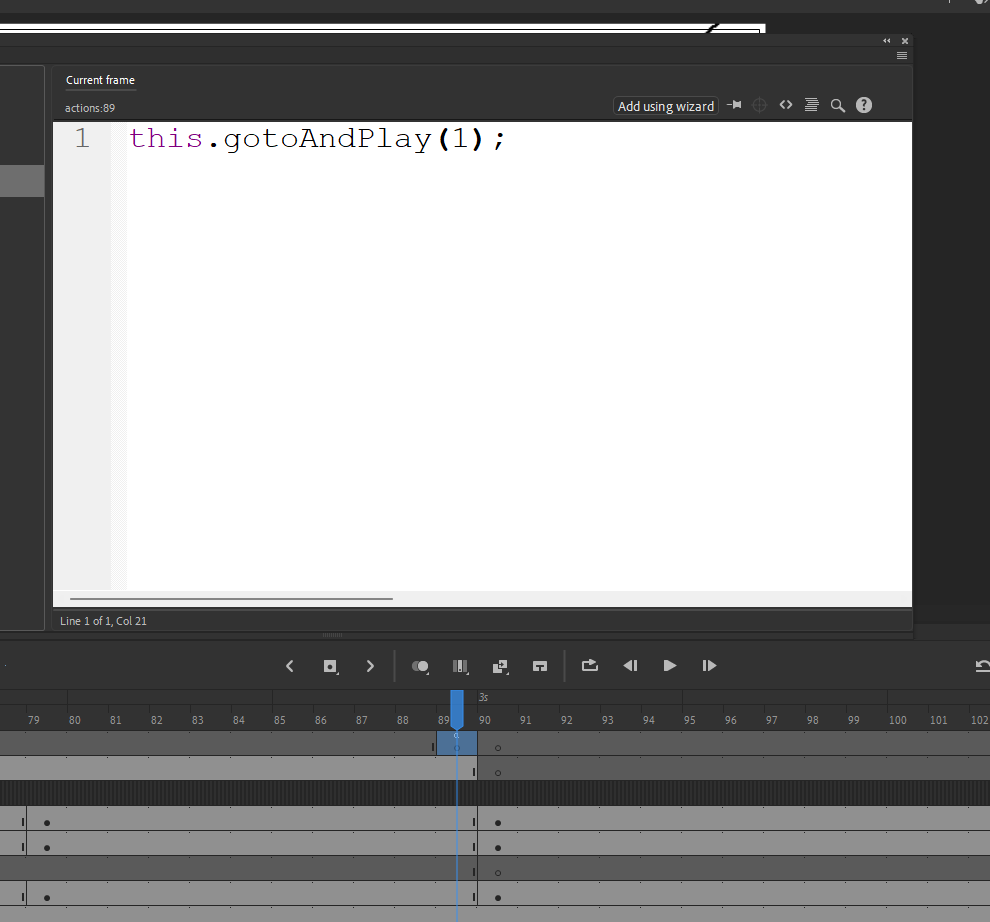
Let's go to frame 89 (right before the animation section starts) and add another keyframe to our actions layer, and reopen the actions menu here (with [F9])
Then, we can add this code, which will just take us back to frame 1 and start over the beginning loop
If you run this now, the beginning part with the play button will loop over and over, and clicking the button will send you to the animation, starting the music and making the play button disappear. Perfect!
Now I'll work on the main animation. This is pretty basic (and tedious) stuff so I won't go over it. This is the part where you have full creative reign and can do whatever you want.
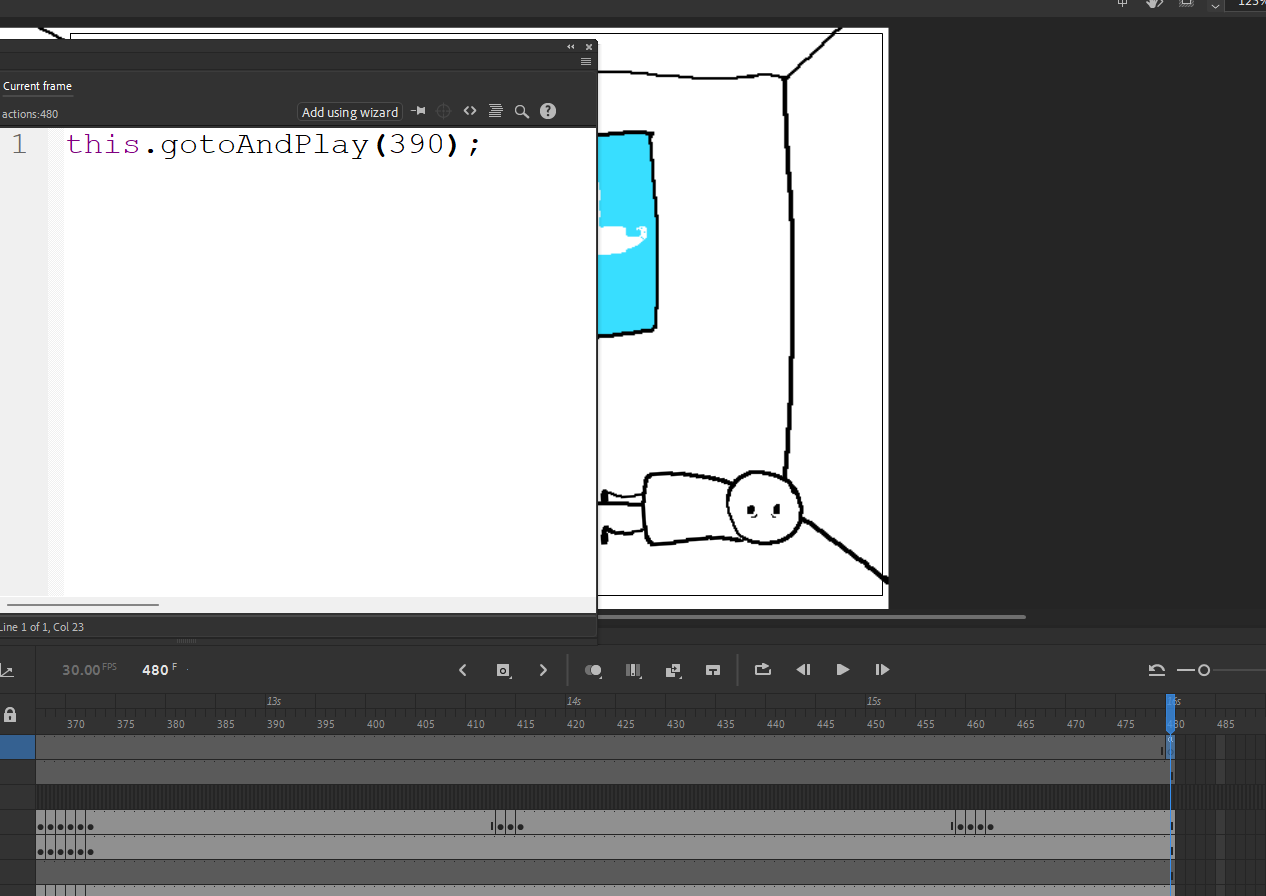
> Create The Ending Loop.
Ok, I finished animating the flash. The character does a dance and then falls down. For the ending segment (highlighted below) I've already added a blinking animation, which we're gonna make a loop.
Just like the end of the beginning loop, let's add an action layer keyframe to the very end of the animation and add the following code to loop back to frame 390 (the beginning of the end loop)
Now let's add our restart button (at the 13-second mark). We'll create a new layer for it, and repeat what we did with the start button
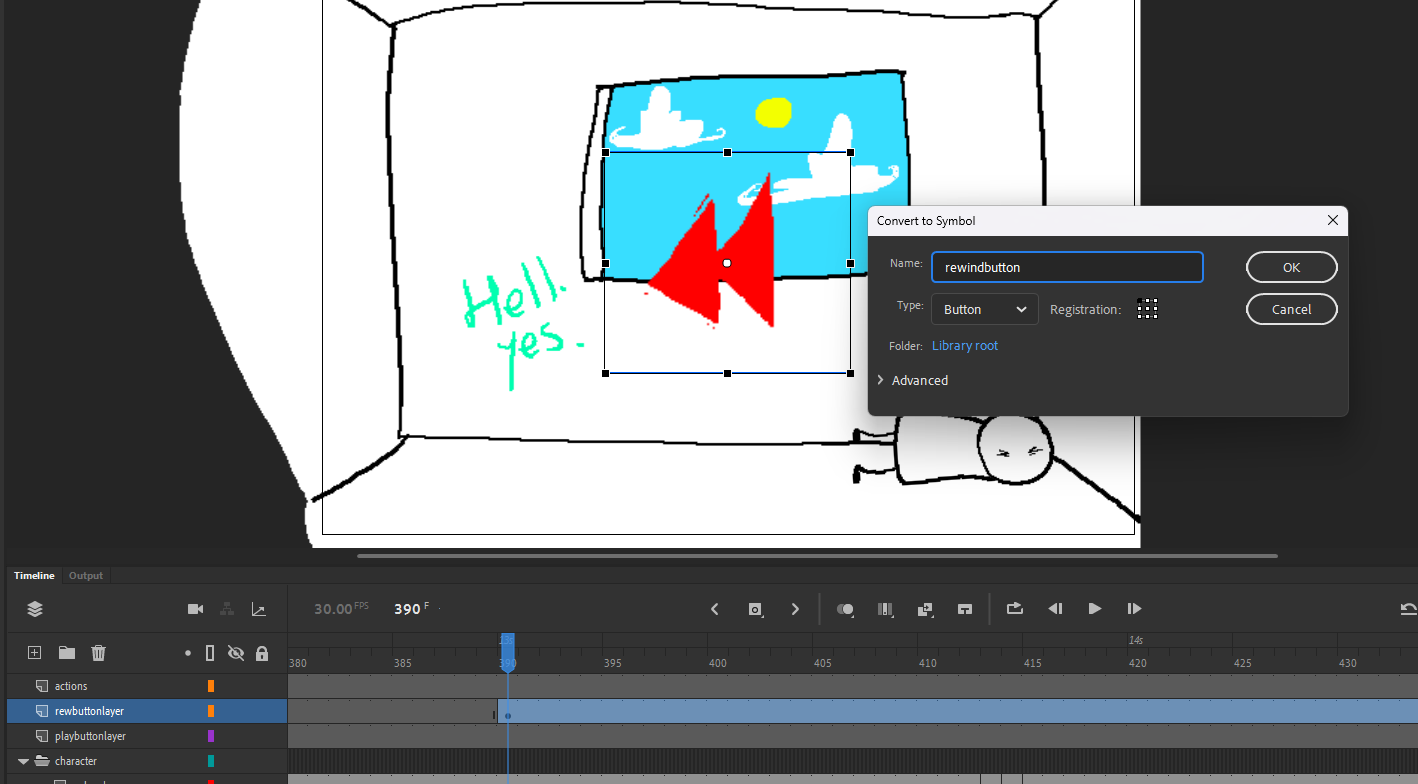
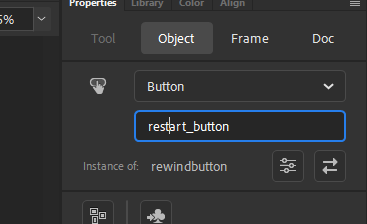
Then, we can go back to our code at the beginning of the animation, and copypaste the start button code for the restart button.
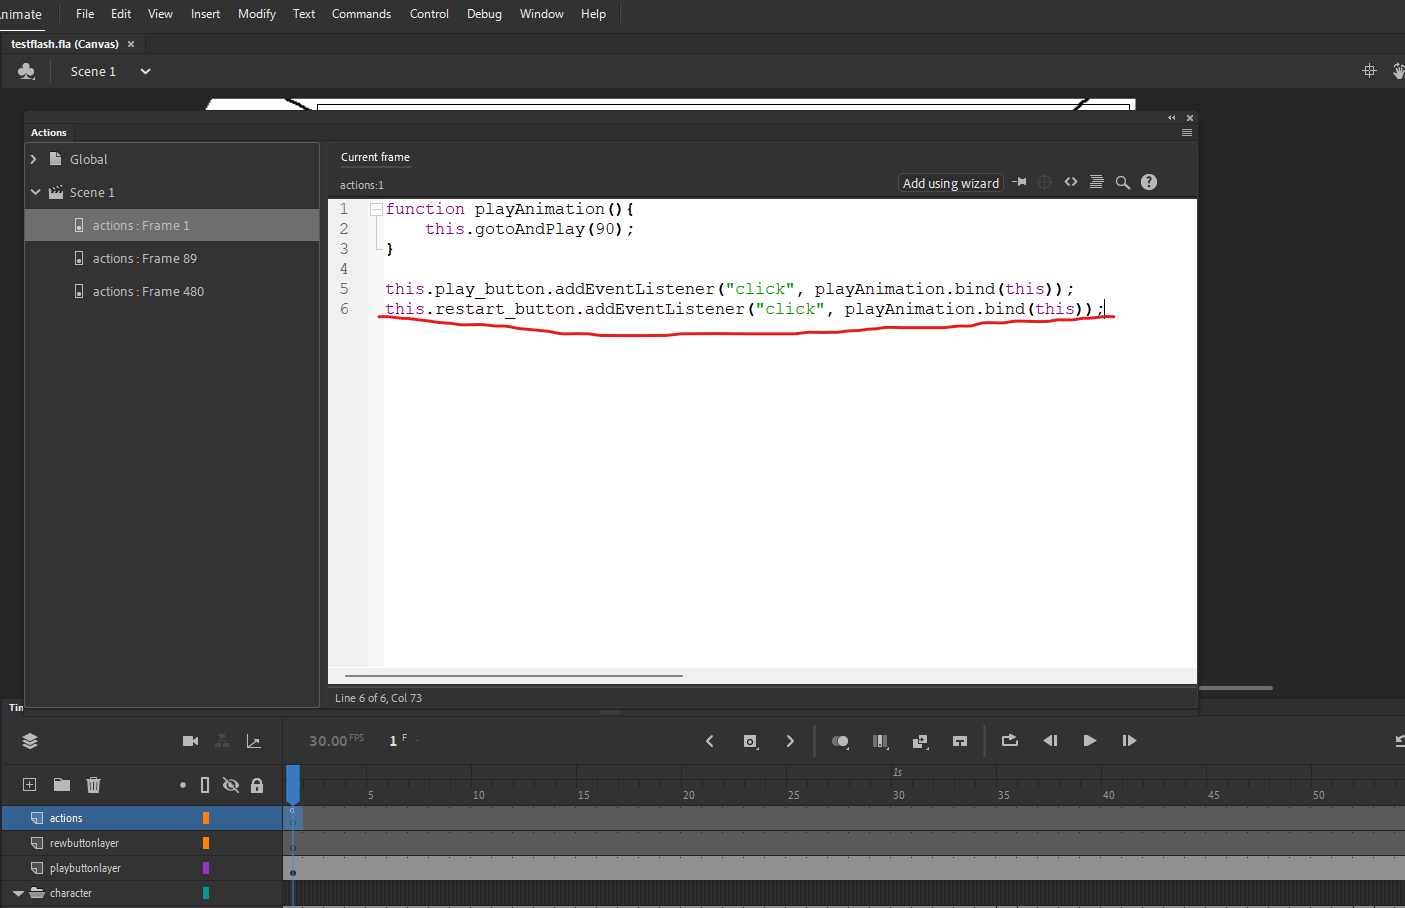
If we test the animation now (Ctrl+Enter) it should work exactly as intended. Awesome.
With that, the animation is basically done, now all that's left is to
> [S] Publish the animation.
Here's where it gets tricky. First, open File>Publish Settings (Ctrl+Shift+F12)
Let's start with adding the preloader (yay!)
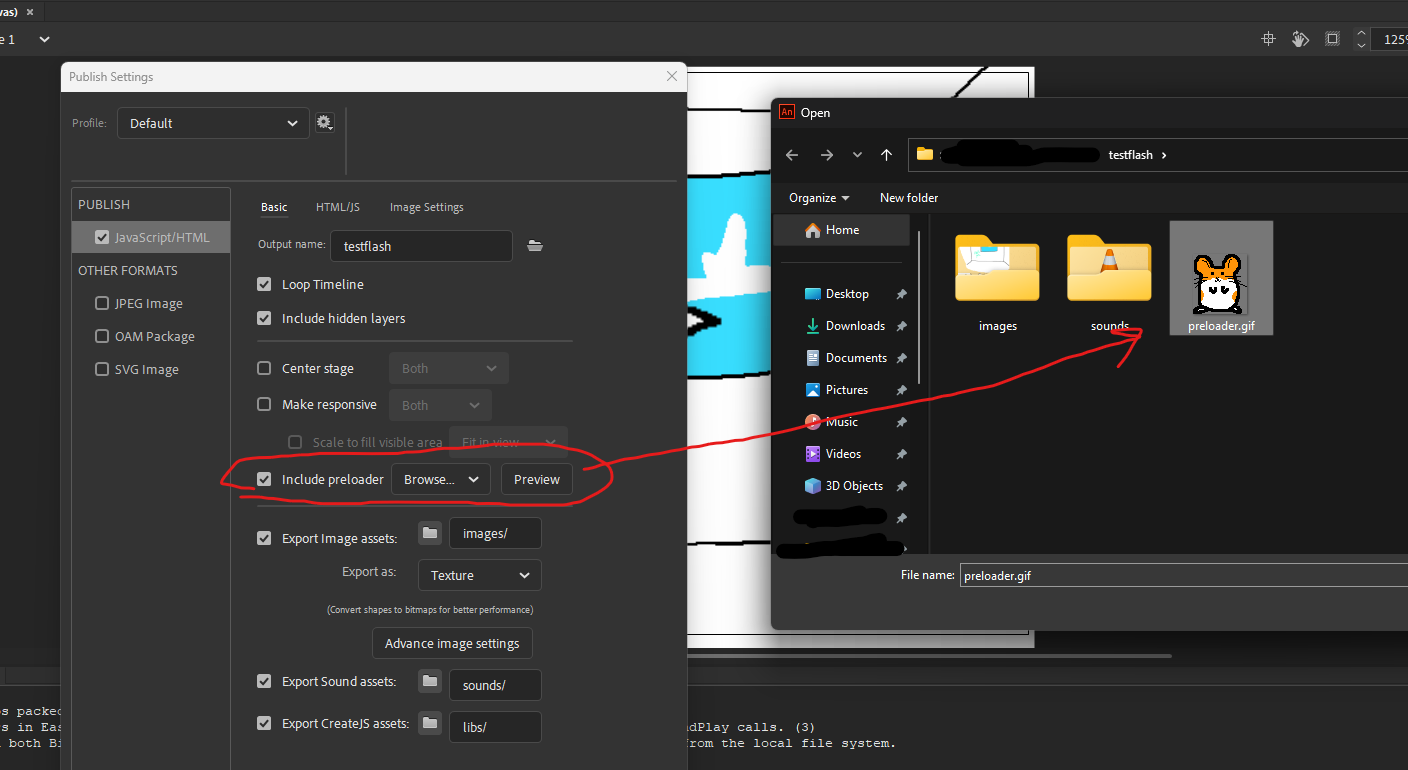
IMPORTANT UPDATE:
Ideally you want to make your flash Responsive, which means that if you view it on a small screen, it'll shrink to fit.
Tick this option to make sure that happens:
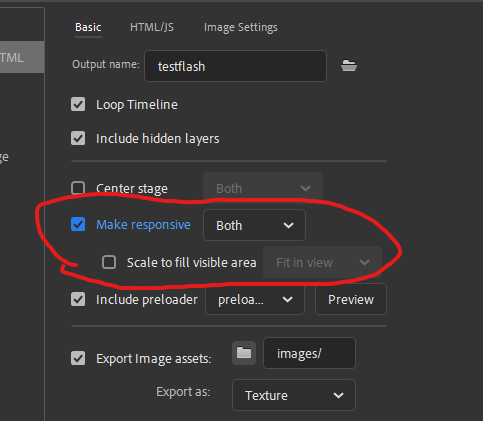
IMPORTANT: uncheck this option to make your life hurt less!
(basically disabling this will put create.js (the graphical backend Animate uses for HTML5) in its own local folder (libs). Otherwise, every time you load the flash, it'll try pulling create.js FROM THE ACTUAL WEBSITE which can be REALLY fucky with these things most browsers have called "CORS policies" that prevent webpages from taking certain files from outside sources. Sometimes this'll work but oftentimes (especially with the host im using) It'll just make everything bad and give you brain damage and nothing will work and you'll feel fucking terrible)

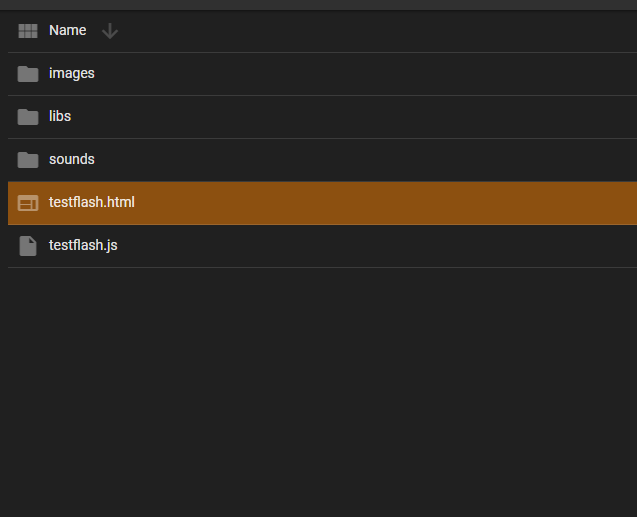
Next, let's publish the animation by hitting [Publish] on the bottom. Then, open the folder you put the project in and you should see these files:
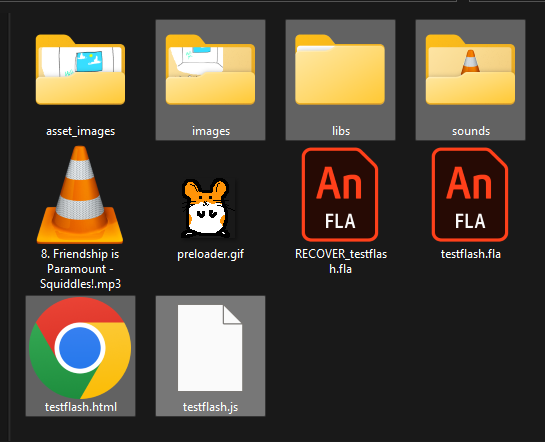
Now, upload the highlighted folders shown above to your file hosting service. Here's how they look on file garden:
> Embed the file.
Next, you wanna turn the HTML file into an iframe if you want to embed it to your actual comic.
You can google how to do this for yourself, but for file.garden, there's a handy feature to automatically create iframes for you:
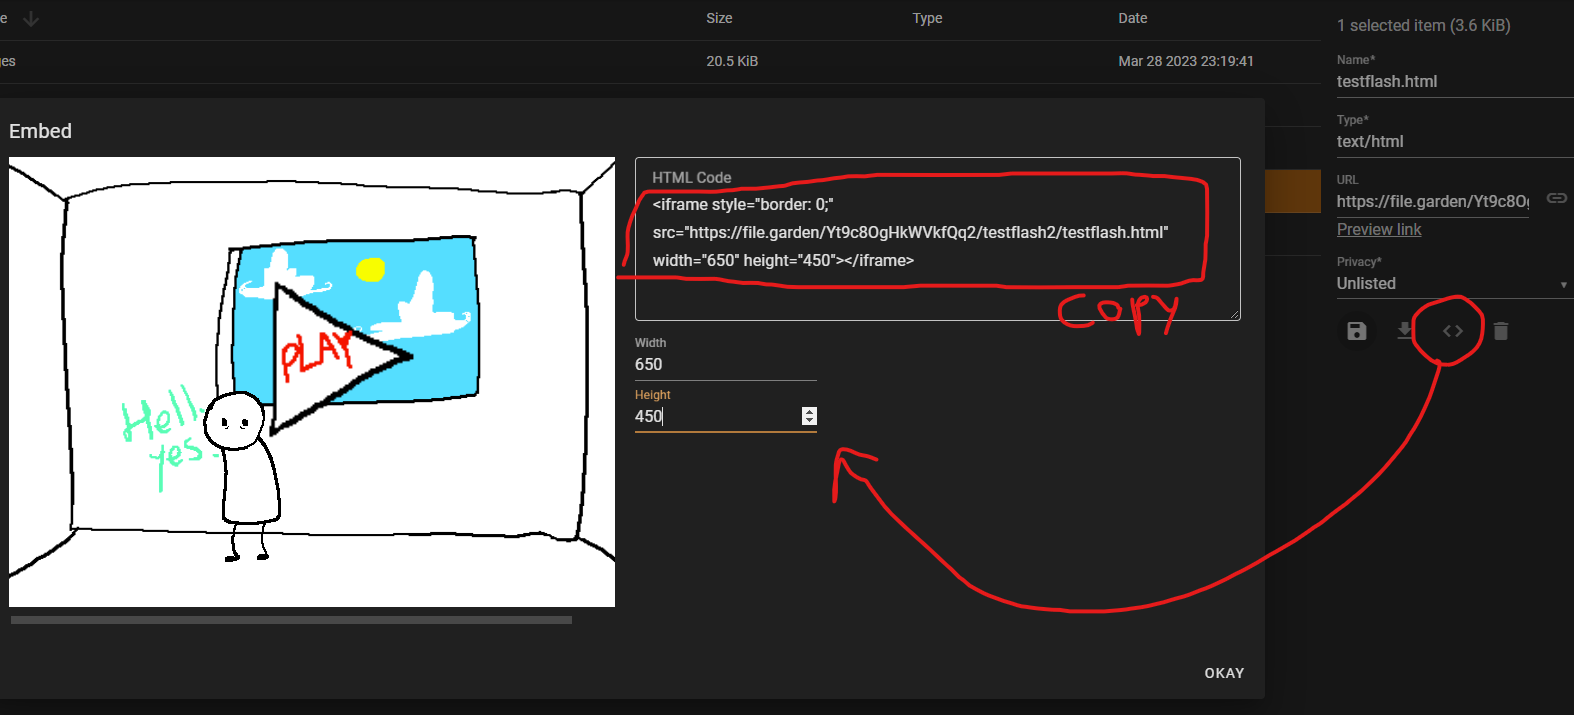
Just copy paste that into your site and you're gold!
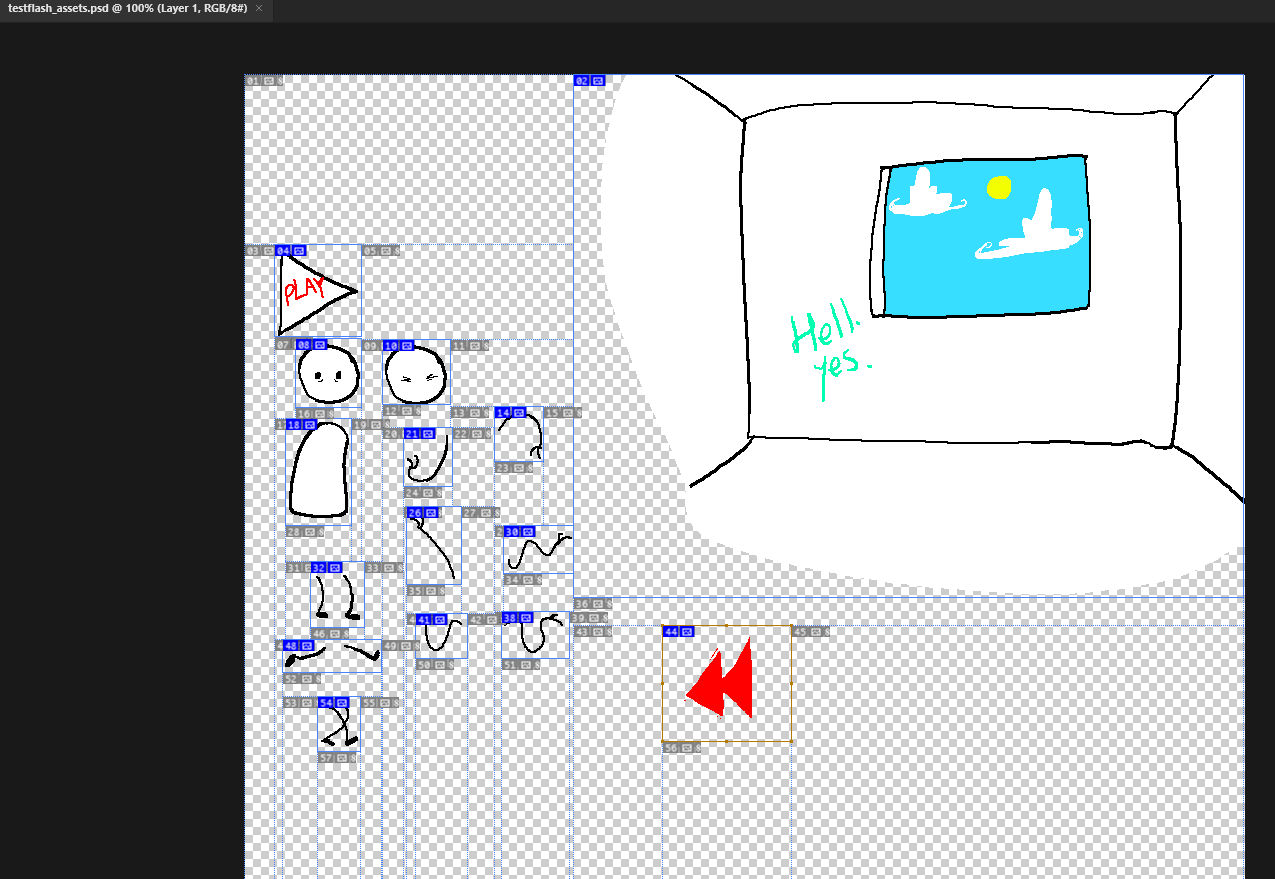
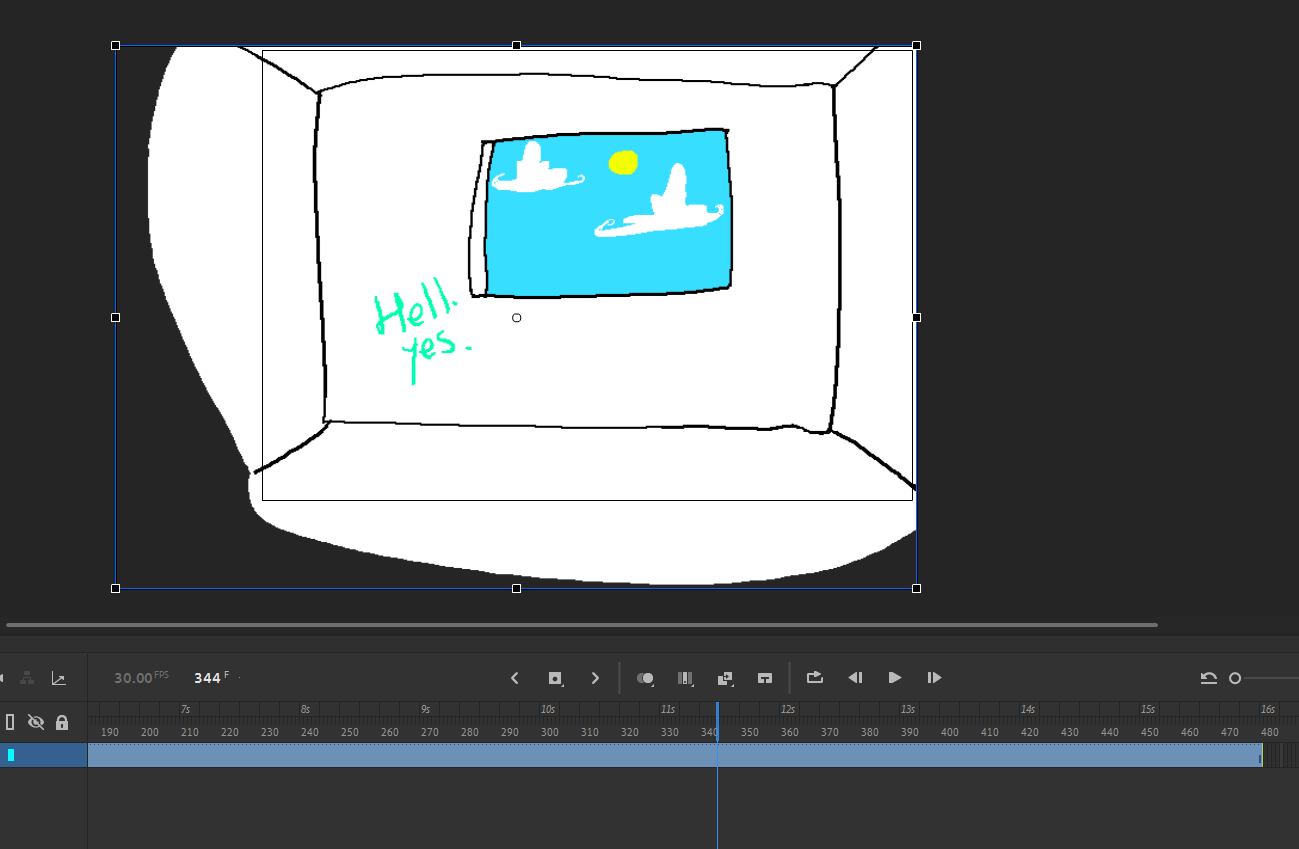
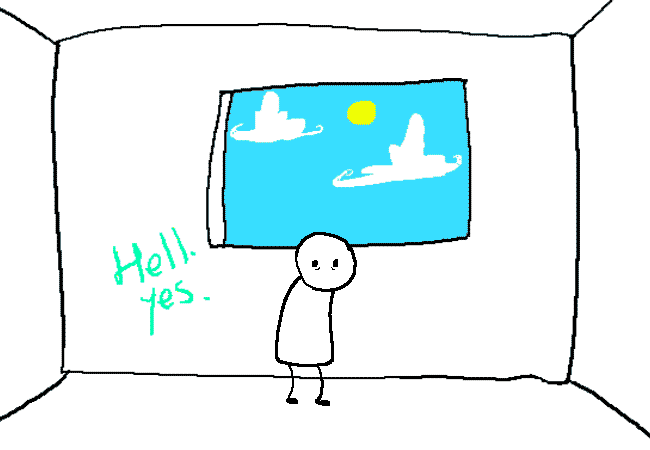
The final product:
Hell. yes. Hell. Fucking. Yes.
(The preloader can look wonky on mobile sites but the flash itself should scale just fine provided you enabled the responsiveness setting before publishing. Unfortunately I can't get rid of the big margin underneath in mobile.)
I hope this tutorial helped, consider following me on twitter!
Extras:
> Audio glitches
If you play the flash I put above, sometimes you'll notice that the audio keeps going past the ending cutscene. This is basically just the underlying system glitching, and the best solution to this would be to trim the audio beforehand in audacity to the exact length you want, so there's no extra audio to play in the first place. I didn't do this cuz I was hurrying up lol.
> Responsiveness and Accessibility
For fancy "big" flashes (take for example, [S]: Cascade, Game Over, or Act 6 Act 6 Intermission 1), you'd often be taking in the desktop view of the site into account when animating the illusion of the events taking place on the page. This can be really cool, but if you have a mobile view that looks completely different from your desktop one, it can look out of place. The easiest ways to circumvent this issue are to supply a youtube link containing a pre-recorded copy of the flash, or to Force the desktop view on pages containing big flashes.
As for accessibility, if your flash contains dialogue, it would be a good idea to include a text dropdown/pesterlog underneath containing a transcript of your flash. These can be pretty tedious to make but are ultimately worth it.
> Full-size preloaders
You may want to make your preloader animation span the whole canvas, which is great for faking a full page flash. Unfortunately, doing so causes a visual bug that causes the preloader to appear below the canvas. The fix is pretty easy.
When you publish your animation, go in the HTML file and remove this (inside the preload div):
That SHOULD work. Reach out to me on twitter if it doesn't.
Alright, thanks for reading.